- Log in to Exchange or your Office 365 Admin account and create a new user account for the service account e.g.: “FrontEnd Service Account”.
- Follow the steps below to set up either Impersonation or Delegation privileges for the service account based on your platform:
Exchange Server 2013, 2016 and Office 365 Enterprise (E)
For Exchange 2013, 2016 and Office 365 Enterprise (E), you can Exchange Admin Center (EAC) to create an Application Impersonation role and assign it to the Service account:
- Open Exchange admin center:
- Office 365: log in to your Microsoft Office 365 admin center as an admin and choose Admin centers > Exchange from the menu on the left.
- Exchange 2013 and 2016: log in to Exchange admin center(https://localhost/ecp)
- Go to Permissions > admin roles (Fig. 1):
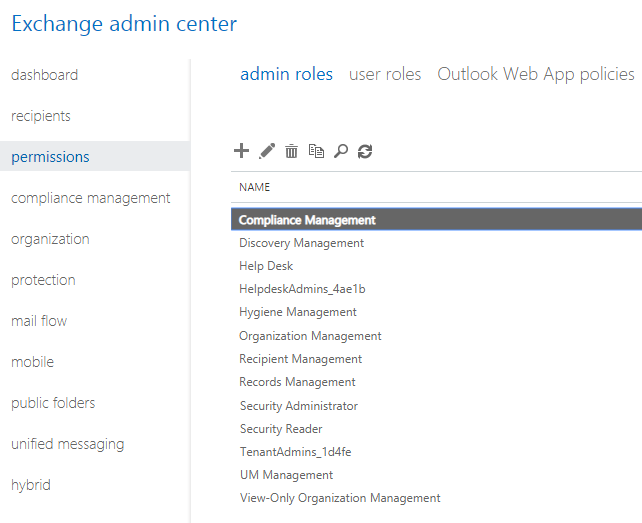
Fig. 1. Admin Roles
Click the + to add a new admin role (Fig. 2.):
- Enter a name for the new role e.g. Impersonation
- Enter a description (optional)
- Leave the ‘Write Scope’ as ‘Default’
- Click the + to add a role. From the list of available roles (Fig. 3.), select the ‘ApplicationImpersonation’ role and click ‘Add’. Then click OK.
- Under ‘Members’, select the Exchange service account mailbox
- Click Save to close.
- The Impersonation role has been created and assigned to the service account mailbox.
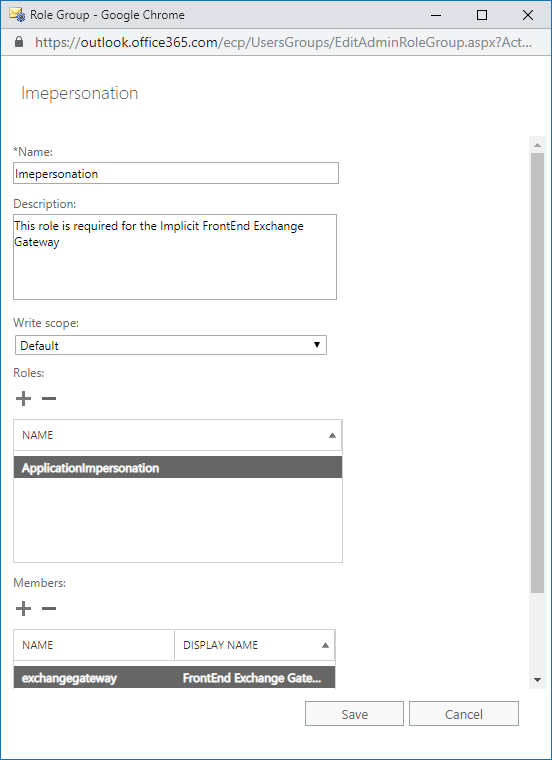
Fig. 2. New Admin Role
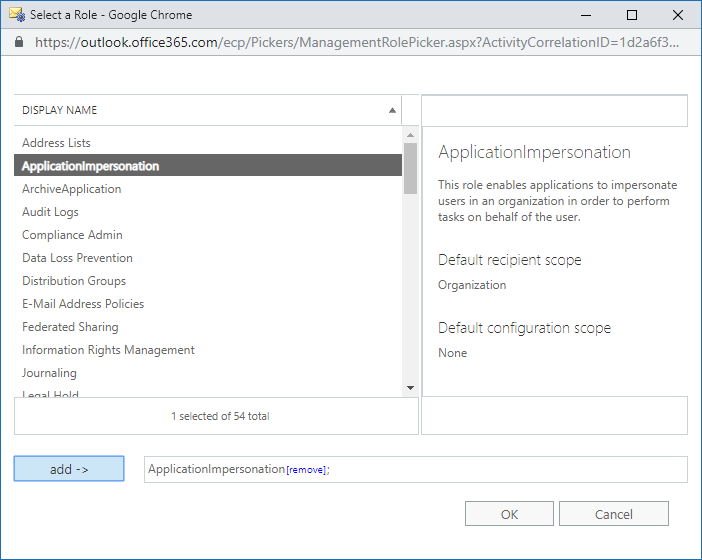
Fig. 3. Select Role
Office 365 Small Business or Professional (P) Editions
Office 365 Small Business or Professional editions do not support impersonation. They only support Full Access Permission Delegation. To assign Full Access Delegation permissions:
- Log in to Office 365 as an Admin user and select the Admin application on the menu bar.
- Under Home, Click ‘+Add a User’ and create a new user mailbox for “FrontEnd Service Account”
- In the navigation pane on the left, select the Exchange Admin Center
- In the navigation pane on the left, select Recipients
- Select one of the FrontEnd users (users who will participate in the Implicit FrontEnd synchronization) and click the pencil icon to edit (Fig. 4). In this example the user is called ‘FrontEnd User’:
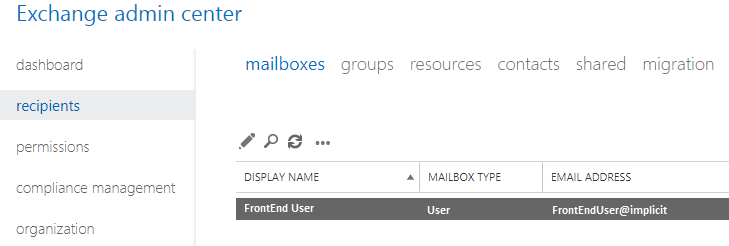
Fig. 4. - In the User mailbox window, select mailbox delegation.
- In the Full Access section, click +.
- In the Select Full Access window, select the ‘FrontEnd Service Account’, select add and click OK. (Fig. 5.)
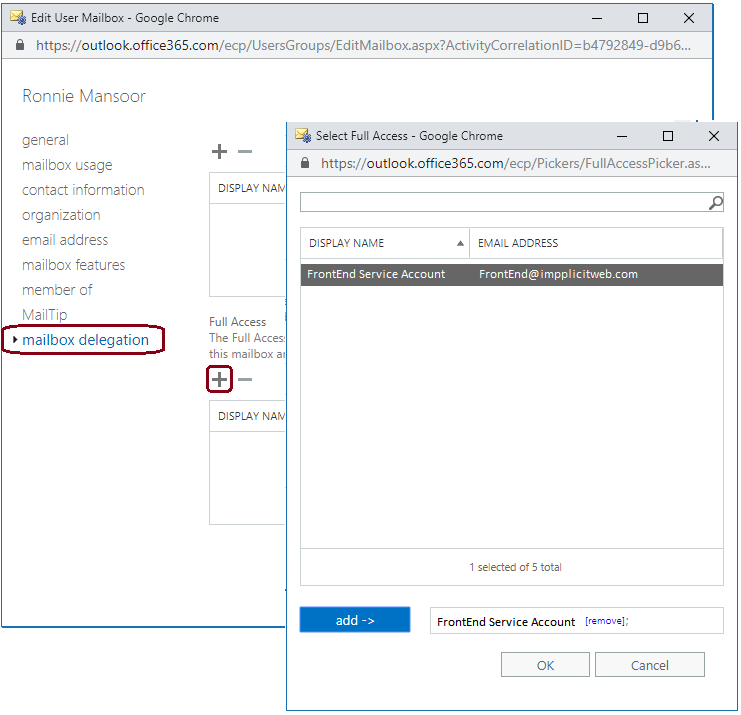
Fig. 5. - In the User mailbox window, select Save.
- Repeat steps 5 to 9 for each user mailbox who will be participating in the Implicit FrontEnd synchronization.
Exchange Server 2010
Prerequisites
The following prerequisites are required to configure Exchange Impersonation:
- Administrative credentials for the computer that is running Exchange 2010 that has the Client Access server role installed.
- Domain Administrator credentials, or other credentials with the permission to create and assign roles and scopes.
- Exchange Management Shell installed on the computer from which you will run the commands.
Exchange 2010 utilizes Roll-Based Access Control (RBAC) to set up permissions. You need to use Exchange Management
Shell in order to setup the permission for the Implicit FrontEnd service account to impersonate the users defined
in the Implicit FrontEnd AD user group so that the service account can synchronize data on behalf of the users.
The process includes the following steps:
- Create an AD group “Implicit FrontEnd User Group” and include all the users that are participating in the synchronization service.
- Open the Exchange Management Shell.
- Run the New-ManagementRoleAssignment cmdlet to add the permission to the service account to impersonate users that are members of the “Implicit FrontEnd User Group”. This is done by defining a Management Scope that limits the scope of permissions to the AD user group:
New-ManagementScope -Name "Implicit FrontEnd Users Scope" -RecipientRestrictionFilter "MemberofGroup -eq '$($(Get-Group "Implicit FrontEnd User Group").Identity.DistinguishedName)'"
- Run the New-ManagementRoleAssignment cmdlet to add the permission to enable the service account to impersonate all users in the AD group:
New-ManagementRoleAssignment -Name:"Implicit FrontEnd Impersonation" -Role:ApplicationImpersonation -User:"FrontEnd Service Account" -CustomRecipientWriteScope "Implicit FrontEnd Users Scope"
Reference:
“Configuring Exchange Impersonation” for Exchange 2010: http://msdn.microsoft.com/en-us/library/bb204095.aspx.
Exchange Server 2007
Prerequisites
The following prerequisites are required to configure Exchange Impersonation:
- Administrative credentials for the computer that is running Exchange 2007 that has the Client Access server role installed
- Domain Administrator credentials
- Exchange Management Shell installed on the computer from which you will run the commands
Exchange Server 2007 utilizes Access Control Lists (ACL) to apply the permissions. You need to apply two permissions:
- ms-Exch-EPI-Impersonation – Permission to authorizes the Service Account to function as an Exchange Impersonation account on the Client Access Server (CAS).
- ms-Exch-EPI-May-Impersonate – Permission to authorizes the Service Account to impersonate specific users (on a user-by-user basis) or all users.
- Open the Exchange Management Console.
- Applying the ms-Exch-EPI-Impersonation right – Run the Add-ADPermission cmdlet to add the impersonation permissions on the server for the Service Account:
Get-ExchangeServer | where {$_.IsClientAccessServer -eq $TRUE} | ForEach-Object {Add-ADPermission -Identity $_.distinguishedname -User (Get-User -Identity "FrontEnd Service Account" | select-object).identity -extendedRight ms-Exch-EPI-Impersonation} - Next, apply the ms-Exch-EPI-May-Impersonate right – Run the Add-ADPermission cmdlet to add permission for the Service account to impersonate specific users. We recommend that you assign this permission individually to each user that needs to participate in the synchronization service rather than globally to all users:
Add-ADPermission -Identity (Get-User -Identity "<username>").DistinguishedName -User (Get-User -Identity "FrontEnd Service Account").Identity -extendedRight ms-Exch-EPI-May-Impersonate
Reference:
“Configuring Exchange Impersonation” for Exchange 2007: https://docs.microsoft.com/en-us/previous-versions/office/developer/exchange-server-2007/bb204095(v=exchg.80)